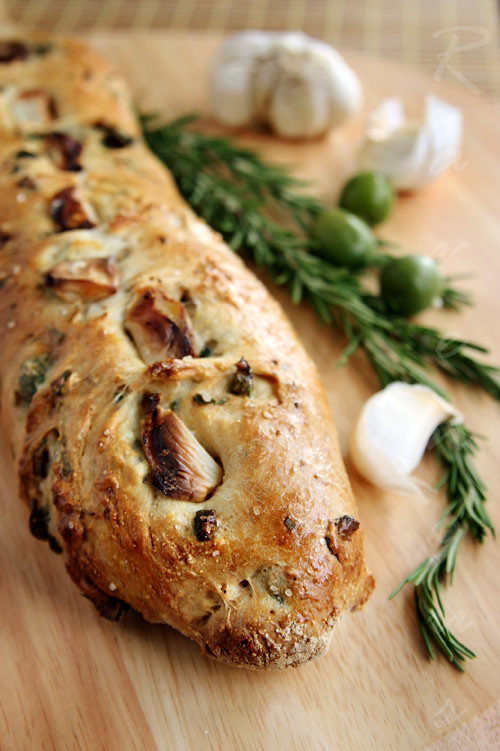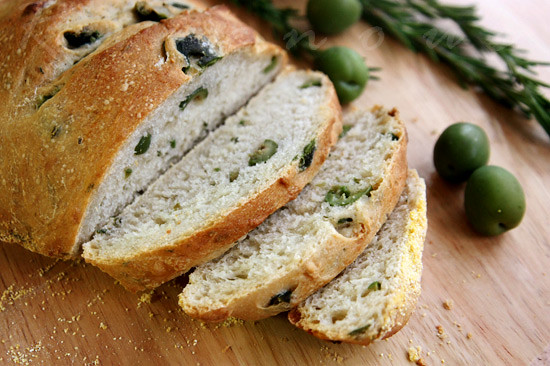
Now that fall is upon us, we look forward to baking bread. We're complete novices when it comes to baking bread...in fact, we confess, this was our first attempt, but that's what makes this post that much more meaningful. Purely due to a lack of motivation, a copy of Artisan Bread in 5 Minutes a Day was collecting dust on our bookshelf. Fortuitously, several months ago, we won a contest that awarded a years supply of California Olive Ranch olive oil and a Viking stand mixer! We were ecstatic and immediately tried to think of the best way to use both of these prizes. So combining Artisan Bread in 5 Minutes a Day, some good California Olive Ranch oil and the 800W power of the Viking stand mixer, we ventured into the world of bread baking.
We admit, if there's an easy way of doing something...then that's what we're doing. So in Artisan Bread in 5 Minutes a Day, Jeff Hertzberg, MD and Zoe Francois (whom we've both met--such nice folks!) teaches us how to make a master dough recipe and technique of no knead bread that can give access to freshly baked bread every day with minimal preparation. A 1-2 week supply of dough is made in advance and refrigerated. Mixing it takes less than 10 minutes. Every day, pull off a chunk of dough and quickly shape it without kneading. Allow it to rest briefly on the counter and then toss it in the oven. It's that simple.
You can also alter the master recipe to make all kinds of bread varieties that would be hard to grow tired of. Naturally, with all that great California Olive Ranch olive oil, we decided to make a no knead olive bread.
You can also alter the master recipe to make all kinds of bread varieties that would be hard to grow tired of. Naturally, with all that great California Olive Ranch olive oil, we decided to make a no knead olive bread.

Helpful bread baking tools include a pizza peel, a baking stone, broiler tray, corn meal, and or wax paper. Although very useful, a stand mixer is not necessary.
No Knead Olive Bread (adapted from Artisan Bread in 5 Minutes a Day)
(makes 4 1lb loaves)
- 6 1/2 cups unbleached AP flour
- 1 1/2 tbs yeast
- 1 1/2 tbs kosher salt
- 1 tbs sugar
- 1/4 cup California Olive Ranch extra virgin olive oil or other high quality brand
- 2 3/4 cup luke warm water (just warm to the touch)
- 1.5 cup coarsely chopped pitted olives
- 1/4 cup coarsely chopped rosemary
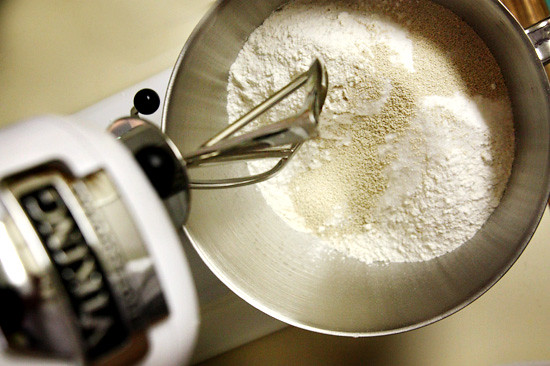
Combine the flour, salt, yeast, sugar and mix ingredients together in a large 5 qt container or a large 5qt stand mixer bowl. Add water and olive oil and using the mixing tool begin to mix. Half way until a wet dough is formed, add the olives and chopped rosemary. Cover loosely with plastic wrap, leaving a small opening and allow it to rise at room temperature until it begins to collapse or at least flatten, about 2 hours. The dough can be used at this point, however, the book recommends refrigerating the dough for another 3 hrs so that it is less wet and sticky.
When ready to bake, prepare a pizza peel by sprinkling corn meal liberally. Sprinkle a small amount of flour on the dough mixture and pull a good grapefruit size piece of dough, using shears to cut the sticky dough as necessary. We then roll the dough into a boule (ball) according to the book direction: Gently stretch the surface of the dough around to the bottom on four “sides,” rotating the ball a quarter-turn as you go, until the bottom is a collection of four bunched ends. Place on pizza peel and allow to rest about 40 minutes. 20 minutes before baking, pre-heat the oven to 450 degrees. Place an empty boiler tray for holding water on another shelf. At this point if you like an egg wash on your bread you can do that and slash the top of the bread with a serrated knife about 1⁄4-inch-deep cross, scallop or tick-tack-toe pattern into the top. (This helps the bread expand during baking.) You can also dust liberally with flour and slash with serrated knife. The dough may flatten a bit, but you can reshape as needed.
With a forward jerking motion of the wrist, slide the loaf off the pizza peel and onto the baking stone. Quickly but carefully pour about a cup of hot water into the broiler tray and close the oven door to trap the steam. Bake for about 30 minutes, or until the crust is browned and firm to the touch.
Watch a video of Jeff and Zoe demonstrate their master recipe here.

The book expands upon the master recipe to flat breads, pizza, and more and also teaches you how to make artisan style loafs such as the wreath, epi, and baguette. So each day or so, pull off new dough to bake. By the 10th day or so, you'll notice a slightly more sour dough taste. Continue to enjoy or use that as a sour dough starter for the next batch.

Every other day, we would pull off dough and make a different style of olive bread, encrusting it with garlic, or sprinkling different toppings such as sea salt, cracked pepper, or sesame. Although newbies, we were so confident with this bread and technique, we even brought some to a dinner party and shared it with friends Gastronomy, Stellar Recipes, Kung Food Panda, and Diana Takes a Bite.
Thanks to Artisan Bread in Five Minutes a Day , Viking, and California Olive Ranch for making home bread baking so easy!
This bread was so very tasty!! Let's have another dinner party again soon :-)
ReplyDeletethis bread looks AMAZING. i will try out the recipe ASAP!
ReplyDeleteThat does look oh so good. Ever had walnuts or pine nuts in your olive bread? So so so good.
ReplyDeletewhat kind of AP Fluor do you use? Looks great and I like to try.
ReplyDeleteGastronomer: yes, how about an apartment warming party?
ReplyDeleteDee: hope it works out for you!
DuoDishes: wow, nuts would seem great with olive bread..thanks!
Pham: unbleached AP flour..really any brand would do.
This does looks so easy! I adore olive bread, and I like that this recipe allows for one fresh bread loaf each day.
ReplyDeleteI love making bread, it is so much easier than you think it will be and so satisfying. You soon start to learn what makes a good bread dough and what you need to do to it to make it work!
ReplyDeleteI want to try this recipe this weekend! I just love olive bread and this looks that I may be able to manage!
ReplyDeleteWELL DONE!! Superb effort and fantastic photography. I am so ashamed of myself. No Knead Olive Bread, here I come!!
ReplyDeleteI did something wrong, but it still came out delicious!
ReplyDeleteMy bread came out HUGE. I mean, it nearly rose to the size of the dang pizza stone!
But the delicious bits are - I used sun-dried tomato stuffed olives, so there are flecks of both throughout this giant freak loaf. AND I put big handfuls of freshly-grated parmesan cheese on top, which formed a delicious crispy crown on top.
I must have let it rise too long - I think I may have let it rise just 30-45 minutes longer than I ought to have...!
(twitter name: citizenrobot)
Ju abd Niss.Adventure: let us know if it works out for you!
ReplyDeleteCitizenRobots: Yes, it does continue to rise during the baking process--hence the recipe only rec pulling out a grapefruit size dough. But glad it tasted great!
This looks fantastic! Thanks for this recipe and for sharing your experience. I will for sure being referencing your recipe in the future! Love the rosemary and olive combo. Boom!
ReplyDeleteyou MUST know that I have a weakness for good bread, and your pictures and descriptions just left me weak-kneed and swooning!
ReplyDeleteFYI, the bread book Artisan Bread in Five Minutes is a laughing stock in the bread community. Just check out the error list on the book's website. It was rushed out there and they didn't even bother proofing it...
ReplyDeletehttp://www.artisanbreadinfive.com/?p=1134
Yum - I love how you snip the bread to give it that interesting shape and make for easy pullapart bits. Now, to convince the bf to make me some..
ReplyDeleteThanks for bringing the olive bread to Cathy's that night. It was really delicious. An olive dish I can approve of!
ReplyDeleteThis bread is mouth watering!
ReplyDelete